With the 80th Anniversary of D-Day the club had decided to celebrate with a day of gaming Normandy scenarios, I decided I wanted an action to use the terrain boards I had inherited from Gus Murchie, a good friend of ours that had passed some years ago, he had done the Le Mesnil Patry board up, so that was me decided on the scenario.

Because of the amount of troops we would have on the board I chose to use the Rapid Fire Reloaded rules, these are quick, accurate and easy to pick up, and with the limited time to play at the club needed something quickish.
 |
| Looking South towards Le Mesnil Patry from Norrey-en-Bessin |
.jpg) |
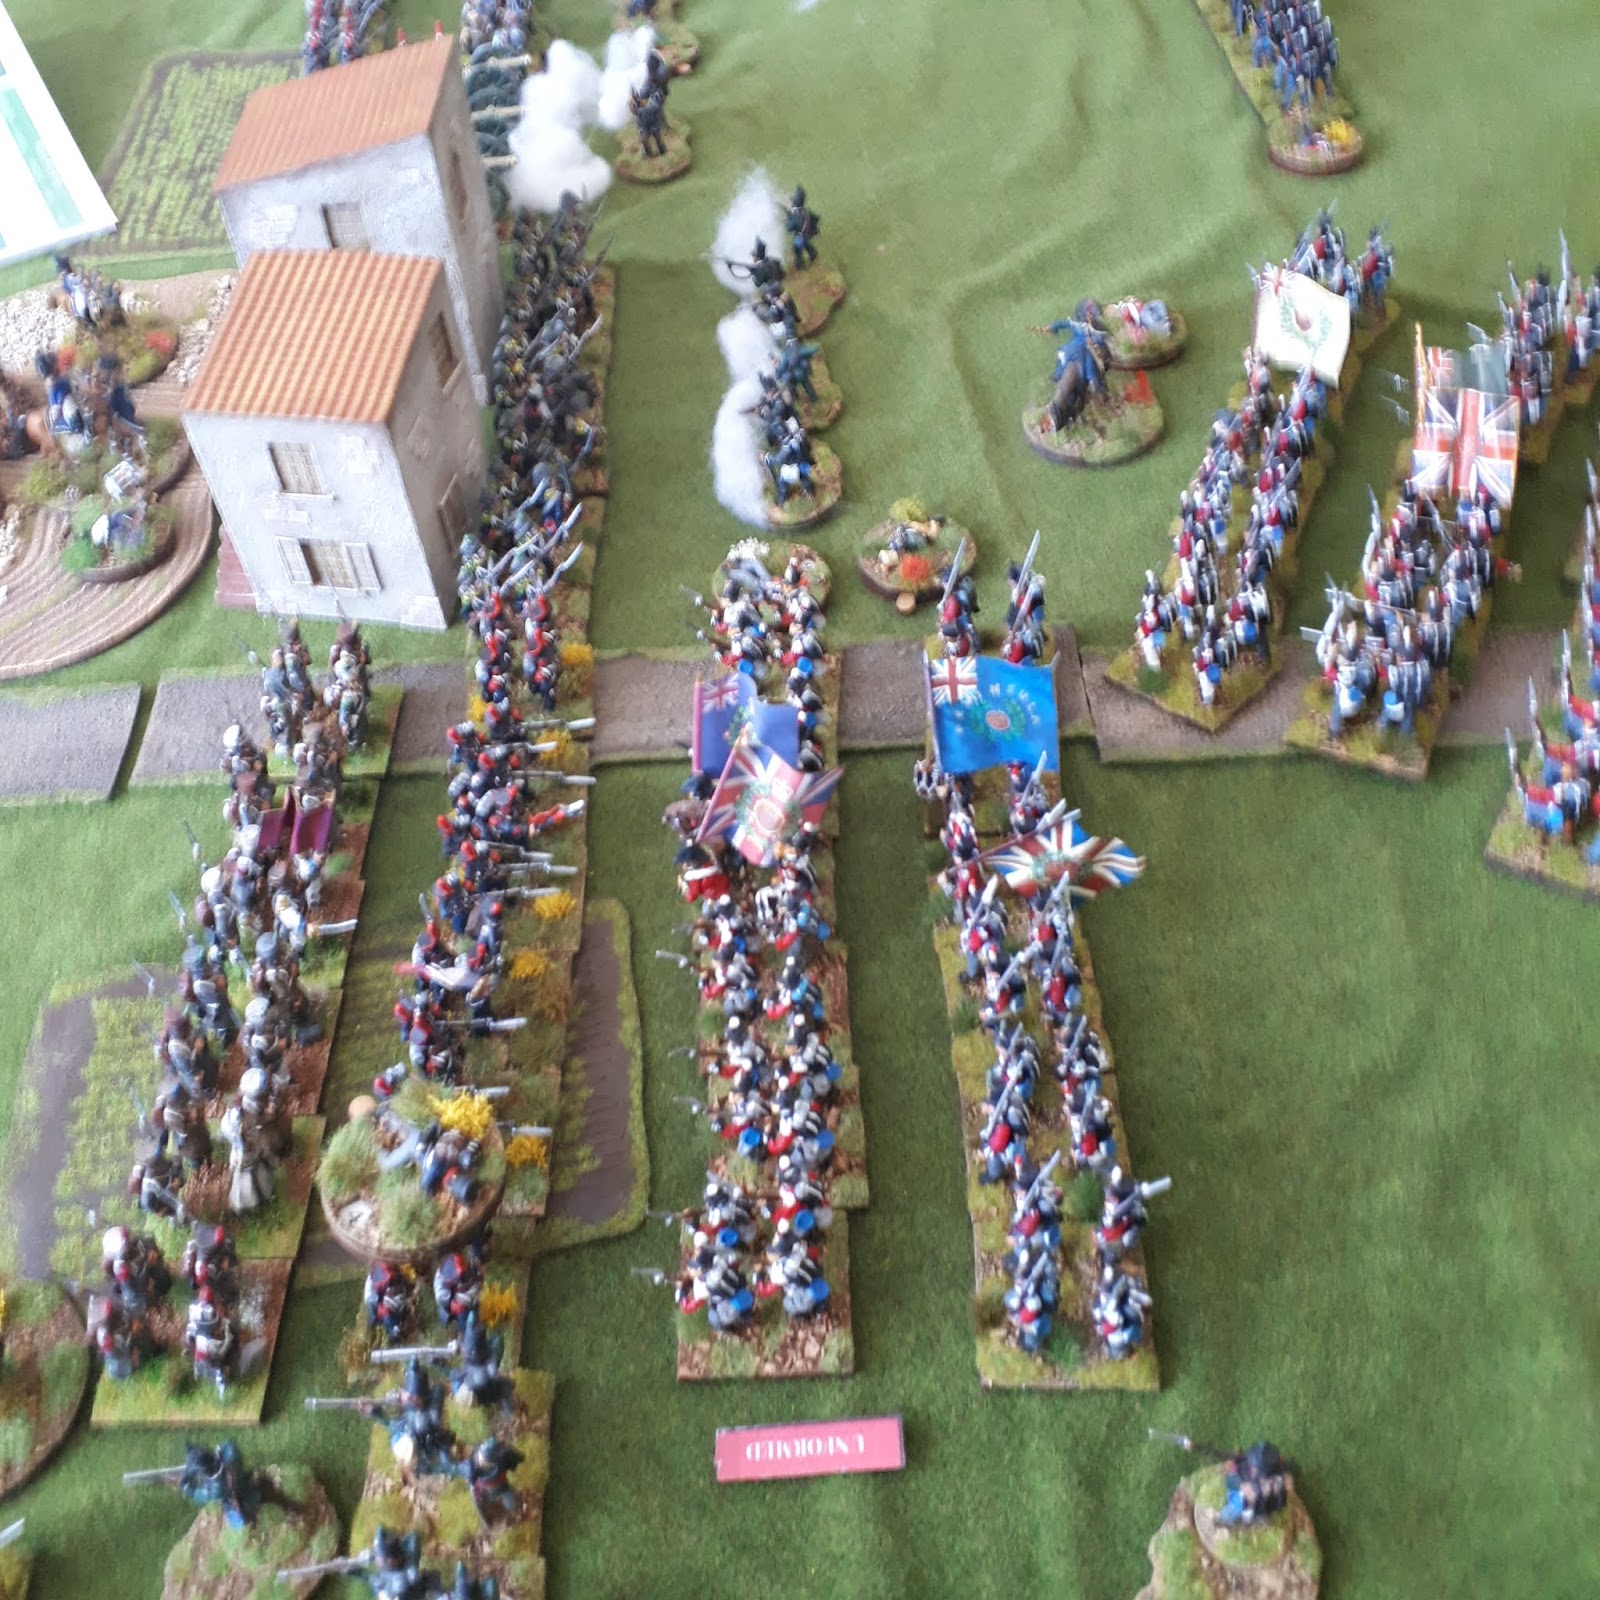
| Looking North fom Le Mesnil Patry |
It is the 11th June, hard fighting has been had over the last few days, but it seems as though the Allies have broken through the German lines and are out into the open country side, the Regina Regiment had taken Norrey in the days before and had set up a defensive perimeter with a minefield.
The Canadian 3rd Infantry Division with support from 6th Armoured are advancing through Norrey, they have been informed by intelligence that there is nothing in front of them apart from broken troops and fragments of units, and they will meet very little resistance moving forward, the Canadian column is passing through the congested streets of Norrey, and expanding out on the road North, the Infantry is on the back of the tanks, the radio security is very lapse with tank commanders giving information loosely over the radio, and the Germans are listening...
.jpg) |
| The column trailing through Norrey heading North towards Le Mesnil Patry, infantry on the backs of the tanks, open radio... |
 |
| Tank riders at the head of the column first turn, B squadron and D coy. leading the way, British move... |
 |
| To the Canadians surprise the Germans brought in a barrage of 105mm and 150mm batteries onto the column as they are leaving the village, C squadron and A coy. taking hits and casualties... Where are those OP's??? |
 |
| The plucky Canadian player as ordered advanced at best speed, however the lead tank ran into a minefield and was ambushed by two coys of Germans... hang on a minute those look like SS... The Canadians had run into the 12th SS Hitler Jugend, 12th Pioneer Battalion and the 2nd Motorised Battalion, of the 26th Panzer Grenadier Regiment |
 |
| D Coy still under artillery are all but wiped out by turn 3 |
 |
| Tank squadron tries to break right of the mined crossroads along the hedgerows, unfortunately the SS ambush with a Pak40 damaging the lead tank, the other squadron turns to fire HE at the pioneers on the ridgeline causing minimal casualties, all the while under HE from the German artillery... Lt.Seigel leading the 8th Company 12th SS Panzer Regiment, with his lone PanzerIV in the distance enters the table, by the apple orchard... |
 |
| The roadway exit in Norrey being very tight, demands slow speed as tracked vehicles have to to two 90degree turns, also a damaged Sherman slowed down exit as well... Lt.Col. Spragge debusses his vehicle and enters the church tower to try and direct some of the Allied artillery which has been silent so far... |
 |
| Germans Pak40 taking its toll on lead Sherman knocking it out, Allied artillery being called in on the Pak and the Pioneers, noted by the red and blue smoke, but doing little damage due to them being well dug in... the rest of the german right exposes itself from dug in positions, another pioneer coy and another Pak40 on the far right of their line, in dug in hedgerow positions... |
 |
| Lt.Bando with 5th Company enters the table traversing through Le Mesnil Patry |
 |
| Allied Artillery called along the line, they had 3 x 25pdr batteries available, which once started were devastating to the German foot, However... there was a clause in their availability, due to the Germans having an allied code book and the poor allied radio control, the German player was able to spoof the allied artillery when the allied player failed a test, which was on a 1 on a D6, allowing the German OP to move the target to a favourable target of their choice... |
 |
| German Op spoofing the allied artillery, bringing in friendly fire on tank column attempting to break out of Norrey to the East, damaging the lead tank... |
 |
| Devastating artillery, constant bombardment along the fortified hedgerow, dwindling the defenders... |
 |
| German armour coming down the road, towards the weakened allied right flank... |
 |
| A tank duel was ongoing on the allied left flank, sherman after sherman fired onto Major Prinz's company of 2 MkIV's, shots being exchanged across the fields of fire, as well as artillery being brought in as well... |
 |
| More allied tanks and infantry steaming out of Norrey, heading up the left flank... |
 |
| Small German counter attack on the allied right causes issues for the allies... |
 |
| meanwhile on the left the allied tank parking lot/scrap yard keeps getting bigger as they timidly try and pry out the German armour of Maj.Prinz. |
 |
| The only tank left defending the allied right is the command vehicle of Lt.Col. Howell himself, tucked in behind hedgerows, and a burning Sherman, not only were the tanks hunting him, but the Germans had started sending out tank hunters and infantry moving forward... |
 |
| Allied left, tanks timidly pushing, however lots of damaged and burning tanks, it was at this point after lots of good morale die rolling, the units started to shatter, it was at this point we had reached turn 12 and the allies had not reached any of their objectives and were ordered back to Norrey to defend the line and recover... |
 |
| Major Prinz was left holding the German line, his being the only opposition in the area, this was unbeknown to the allies who were very timid here expecting a host of Germans, but these had been pounded by the artillery and had retreated back to the town due to morale breaking, there were no more Germans left on the left apart from this one tanks, if only they had known... Thanks to all that played in the game, i enjoyed running the scenario and spinning some surprise onto all parties, the rules played well with the amount of forces on the board, try them you never know you might like them, some tweaks and some judgement are required but a fun game was had in the few hours we had to play in. OOB's and rule tweaks listed below taken form various online sources and a combination of scenarios were used to put this game together. |
Canadian Order of Battle
- All regular elements of :-
3rd Canadian Infantry Division 2nd Armoured Brigade
TAC HQ (Brig Wyman) Sherman (dummy gun, VMG)
6th Armoured (1st Hussars) Regiment, 2nd Canadian Armoured Brigade
(Lt Col Colwell) HQ Sherman (75mm),
1x Crusader (2 x 20mm), 1x Dingo s/car, Reconnaissance Troop 2x Stuart (37mm)
A, B & C squadrons each of:-
17pdr Sherman Firefly, 2 x Sherman (75mm)
10th Armoured (Fort Garry Horse) Regiment, 2nd Canadian Armoured Brigade
B & C squadrons each of:-
17 pdr Sherman Firefly, 2 x Sherman (75mm)
Queen’s Own Rifles of Canada, 8th Canadian Infantry Brigade (Lt Col Spragge)
test @ 25 casualties
HQ CO + 6 figures, PIAT, 2” mortar, 15cwt,
Carrier platoon
3 figures, PIAT, 2 figures, Bren Carrier.
A, B, C & D companies each of:-
8 figures
Support company
6pdr ATG,3 figures, Lloyd prime mover, 3” mortar, 3 figures, Bren Carrier.
C, Company, the Regina Regiment, 7th Canadian Infantry Brigade
no morale test
8 figures
These are deployed in Norrey and are dug-in or in IP.
[off board artillery]
12th Field Regiment, RCA 3 batteries, each of:-
each 2 x 25pdr field gun, RAM OP tank (dummy gun)
On board forces setup as indicated along the road with infantry as tank riders.
• C Company, Regina Regiment in any building in Norrey
• B Squadron, 1st Hussars + D Company Queen’s Own (tank riders) @ A
• C Squadron, 1st Hussars + A Company Queen’s Own (tank riders) @ B
• RHQ, OP tank, BHQ Queen’s Own, Recce Troop, Carrier platoon, Queen’s Own @ C
• A Squadron, 1st Hussars @ D
• Brigade TAC HQ @ E
Reinforcements arrive on the road at F on the turn indicated:
• B Squadron, Fort Garry Horse + B Company, Queen’s Own (tank riders) – turn 1
• C Squadron, Fort Garry Horse + C Company Queen’s Own (tank riders) – turn 2
• Support Company Queen’s Own – turn 2
The Canadian player moves first.
German Order of Battle
All regular except AFV units which are Elite:-
Elements of 12th SS (Hitler Jugend) Panzer Division [on-board]
12th SS Pioneer Battalion (-) (Maj Muller) [south of road]
test @ 15 casualties
HQ CO + 4 figures, Panzer shrecke, Personnel carrier
1st & 2nd Companies
each 8 figures, P/faust, medium truck
4th (Heavy Weapons) Company
Sdkfz 251/2 81mm mortar HT 3 figures,
1 x MMG 3 figures, P/faust, medium truck,
75mm PAK 40 ATG, 3 figures, Sdkfz 10 HT
______________________________________________________________________________
2nd (motorised) Battalion, 26th Panzer Grenadier Regiment (Maj Siebken) [north of road]
test @ 17 casualties
HQ CO + 4 figures, Panzer shrecke, Personnel carrier
5th, 6th & 7th Companies
each 8 figures, P/faust, medium truck
8th (Heavy Weapons) Company
1 x MMG, 3 figures, P/faust, medium truck,
81mm mortar, Sdkfz 10 HT, 3 figures,
75mm (Pak 40) ATG, 3 figures, Sdkfz 11 HT prime mover.
Reinforcements
2nd Battalion, 12th SS Panzer Regiment
8th company
1 x Panzer IV (75mm) ** (Lt Siegel) [turn 2 @ H] ** test as independent AFV
5th company
2 x Panzer IV (75mm) (Lt Bando) [turn 3 @ I]
6th company
2 x Panzer IV (75mm) (Maj Prinz) [turn 4 @ I]
[off-board artillery]
2nd Battalion, 1st SS Panzer Artillery Regiment
2 x 105mm howitzers OP team , light car with 2nd battalion
3rd (Heavy) Battalion, 1st SS Panzer Artillery Regiment
2 x 150mm howitzers OP team , light car with Pioneer battalion
All German infantry and AT guns start dug-in slit trenches and weapon positions. (German LMGs +1) applies. Pioneers were issued with extra AT grenades and mines so can use against a moving AFV on a 6 or open top on a 4,5 or 6. The German player moves second.
Additional Rules
• Off board Artillery
− Off board artillery and on board mortars may fire smoke or mixed missions twice during the game.
− There is a clear LOS from Mesnil-Patry church tower and the Chateau (both multi-level BUS) into the centre of Norrey. This should allow the Germans to direct fire into the centre of this village while the Allies are forming up for the attack.
− German Spoofing of Allied Artillery. The Germans had recently captured an Allied Artillery code-book and understood their call for fire procedures. In this battle they used this intelligence to Spoof the Allied Artillery into firing onto their own troops. Therefore, if at any point in the game the Allied player fails a “Call for fire roll” the German player may declare that he is attempting to Spoof the Allied Artillery. To do this he re-positions the Allied players target wherever he wishes. This must be spotted by a FOO who can do this even if he called for fire in the previous turn.
The FOO calls for fire anything but a 1.
If successful the indirect fire arrives and really rots up the Allied player’s day – but the German player cannot repeat the trick!
If unsuccessful the trick may be repeated with a cumulative -1 modifier each time it is tried.
• Transport
− If desired, the German player may discard soft-skin vehicles from the order of battle.
− Soft-skin Transport does not count towards overall ME size but if destroyed does count as casualties. Armoured transport counts towards overall ME size and casualties if destroyed.
• Hidden Unit Status
− All German units count as hidden units before the game starts. Mark onto map location of company's and guns etc.
• British “Ride in the Park” mentality and poor wireless discipline
− Because of the inadequate time to brief the troops for this assault there was a “ride in the park” mentality in existence. Most thought that they were advancing into unheld terrain to support an artillery shoot or, at worst, that any resistance would be light. This attitude, coupled with inadequate of training and lack of combat experience led to the advancing tank units indulging in unnecessary chatter while advancing, including an almost narrative account of their line of advance.
All of this was intercepted by the 12th SS.
• Narrow Streets in Norrey-en-Bessin
− The streets in Norrey were unusually narrow, especially around the church where the houses were very close to the road. Tanks had difficulty passing this point normally but when under fire or with rubble blocking the road, the defile became almost impassable.
To represent this:-
− Road Speed and Paved Road bonus may not be used in Norrey Streets.
− The move that a Tracked Vehicle passes the church, this must be done entirely at half speed. Wheeled, half-tracked, small or medium vehicles are unaffected.
• German Command Structure
− Seibken and Müller’s battle groups have separate chains if command. They may not co-ordinate their actions and are best represented by separate players.
• Haystacks
− The fields around Mesnil-Patry were dotted with tall grain fields and haystacks that afforded excellent cover to infantry and guns.
− For game purposes these haystacks in the fields are regarded as Light cover.
• Defensive Mining
− The German player may lay up to 2 defensive mine fields.
− Outskirts of Norrey and the fields stretching towards Bretteville were heavily mined by the Regina Rifles during the preceding 3 days. Although this will act as a defensive barrier for the Allies it will also impede your movement in to, out of and around the village.
− If playing with an umpire the Canadian player should only be told about the existence of the defensive mining when one of his units moves adjacent to one of the areas or the turn his forces enter Norrey.
− All Canadian minefields are medium density mixed AT and AP minefields.
The battle area was open countryside dotted with many farms, villages, crops and orchards.
• The playing area is 6ft x 4ft and north is the left long side of the map.
• All buildings are stone.
Norrey is considered under Canadian control and Mesnil-Patry under German Control.
.jpg)
.jpg)
.jpg)